

SITE LOGIN
-
REVIEWS
- Ski Gear
- Clothing
- Accessories
- Off-Season Gear
- Lifestyle
- Lodges and Accommodation
- Nutrition
- Manufacturers
- Destinations
- Training
- Gear of the Year
- Best New Summer Gear
-
Holiday Gift Guide
-
Holiday Gift Guide 2024
- Holiday Gift Guide 2024 Base Layers
- MSR Explore Revo Snowshoes
- Fieldsheer Backcountry Heated Jacket
- Fieldsheer Premium 2.0 Merino Heated Socks
- MEC Hut Booties and Slippers
- Arc’teryx Kopec GTX Shoe
- Arc’teryx Kragg Insulated Approach Shoes
- Gregory Verte 18 Backpack
- Grundens Deck-Boss Ankle Boot
- MEC Northern Light Vest
- Montec-Scope-Ski-Goggles
- Mountain Hardware Kor Airshell Hoody
- Mountain Hardware Kor Alloy Crew
- Arcade Atlas Belt
- Dynafit Ridge Dynastretch Jacket
- Shokz OpenRun Pro 2 headphones
- Buff Merino Move Multifunctional Neckwear
- Bootdoc Foot Warmer
- Cotopaxi Allpa 42L Travel Pack
- DPS LastBag
- DPS PHANTOM Glide At-Home Kit
- DPS Mission Quiver Roller
- Dragon Amped sunglasses
- Dragon DX3 Plus OTG photochromic goggle
- Fuse Lenses Anclote Flashback
- Garmin Fenix 8 Solar Sapphire Watch
- Gregory Alpaca Gear Tote 30
- Hotronic Boot Dryer
- MEC Aluminum Pot Set
- Gnara Go There Pants
- Grundens Shackleton 2.0 Duffel
- Jones Deeper 19L Backpack
- Le Bent Core Midweight Crew base layer
- Leatherman ARC
- Montane Nordes Hooded Softshell Jacket and Pants
- Helly Hansen Odin Everdown Hooded Jacket
- Helly Hansen Verglas Infinity Shell Jacket 2.0
- Montec Fawk Ski Jacket
- Pomoca Free Pro 2.0 Skins
- Rab Glaceon Pro Down Jacket
- Rab Khroma Converge GORE-TEX Ski Jacket & Pants
- Smith Squad MAG Goggles
- Stellar Guide Aerogel Hybrid Hood 2.0
- Stellar Ultralight Down Hood 2.0
- Arms of Andes Alpaca Half Zip & Wool Leggings
- Cotopaxi Allpa 70L Duffel Bag
- Giro Taggert Mips Helmet
- Loonr Hi Flyer Boots
- Paka Mountain Crew
- Roll Recovery SUPERPLUSH Classic Shoes
- Smartwool Smartloft Hooded Jacket and Pants
- Ortovox Switchback 32 Ski Touring Backpack
- Cotopaxi Allpa X 3L Hip Pack
- Giro Sagen Ski Goggle
- Icebreaker Ski+ Over the Calf Socks
- MEC-Fireside-Fleece-Snap-Pullover
- Montec Roast Mittens
- Mountain-Hardware-Sunblocker-Hoody
- MSR Titan Kettle 900 ml
- Tailgate-Industries-The Gondom-Goggle-Cover
- Wild Country Rope Tarp
- Bootdoc Race Merino PFI 50 Socks
- Remind Soles Destin Impact Insoles
- Kari Traa Rose Baselayer Half Zip Top and Pants
- Le Bent Midweight Quarter Zip
- Ombraz Dolomite Sunglasses
- Ortovox Fleece Rib Hoody
- Ortovox Merino Thermovent Base Layer
- Smartwool Intraknit Merino Tech Half Zip
- Suunto Wing Bone Conduction headphones
- Sweet Protection Adapter Mips Helmet
- Sweet Protection Connor Rig Reflect Goggles
- Zeal Optics Selkirk Glacier Glasses
- Norrona more flex1 Pants
- Norrona Octa Zip Hood
- Norrona Lyngen Alpha100 Zip Hood
- MEC Deluxe Pillow
- Holiday Gift Guide 2023
- Holiday Gift Guide 2022
- Holiday Gift Guide 2021
- Holiday Gift Guide 2020
- Holiday Gift Guide 2019
- Holiday Gift Guide 2018
- Holiday Gift Guide 2017
- Holiday Gift Guide 2016
-
Holiday Gift Guide 2024
- Pro Skier Interviews
- NEWS
- STORE
- ROUTES
- LODGING
-
VIDEOS
- 2022/23 Gear Reviews
- 2021/22 Gear Reviews
- 2020/21 Gear Reviews
- 2019/20 Gear Reviews
- 2018/19 Gear Reviews
- 2017/18 Gear Reviews
- 2016/17 Gear Reviews
- 2015/16 Gear Reviews
- 2014/15 Gear Reviews
- 2013/14 Gear Reviews
- 2012/13 Gear Reviews
- 2011/12 Gear Reviews
- 2020 Outdoor Retailer
- 2019 Outdoor Retailer
- 2018 Outdoor Retailer
- 2017 Outdoor Presscamp
- 2017 Outdoor Retailer
- 2016 Outdoor Presscamp
- 2016 Outdoor Retailer
- 2015 SIA Show
- 2014 Outdoor Retailer
- 2013 SIA Show
- 2012 Outdoor Retailer
- Tips and Tricks
- Backcountry Skiing
- SAFETY
- ABOUT
- REVIEWS
- NEWS
- STORE
- ROUTES
- LODGING
-
VIDEOS
- 2022/23 Gear Reviews
- 2021/22 Gear Reviews
- 2020/21 Gear Reviews
- 2019/20 Gear Reviews
- 2018/19 Gear Reviews
- 2017/18 Gear Reviews
- 2016/17 Gear Reviews
- 2015/16 Gear Reviews
- 2014/15 Gear Reviews
- 2013/14 Gear Reviews
- 2012/13 Gear Reviews
- 2011/12 Gear Reviews
- 2020 Outdoor Retailer
- 2019 Outdoor Retailer
- 2018 Outdoor Retailer
- 2017 Outdoor Presscamp
- 2017 Outdoor Retailer
- 2016 Outdoor Presscamp
- 2016 Outdoor Retailer
- 2015 SIA Show
- 2014 Outdoor Retailer
- 2013 SIA Show
- 2012 Outdoor Retailer
- Tips and Tricks
- Backcountry Skiing
- SAFETY
- ABOUT
TOP VIDEOS
Black Diamond Storm Headlamp, Venom Ice Axe and Couloir Harness
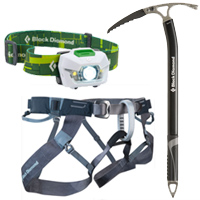 At the end of a summer in the Rockies my partner and I decided to take a climbing trip to Chamonix, the birthplace of mountaineering. As we considered what gear to bring weight, size and versatility were huge considerations as the threat of excess baggage fees loomed over us. As such, I was super excited to acquire a few new Black Diamond products and was stoked to try out the Venom Ice Axe, the Storm headlamp and the Colouir harness. Being a hybrid axe, the Venom seemed to have the versatility we were looking for and because the Colouir is lightweight and easy to stash in an already full pack it easily made the cut. Since we weren’t intending on doing any night missions or early morning starts in the dark (no alpine starts needed when a lift takes you to 3800m), but really you never know in the mountains, the Storm seemed like a great choice for the trip.
Black Diamond Venom Ice Axe:
Price: $149 US
Weight (with leash): 528 g / 1 lb 3 oz
The Black Diamond Venom Ice Axe is not the lightest ice axe on the market but it's a solidly built hybrid ice axe. The Venom is designed not just for your standard mountaineering alpine terrain but is also at home on steeper ice and colouirs thanks to its curved upper shaft. This subtle curve provides clearance for your hands on more vertical routes and a more ergonomic feel. You can order the Black Diamond Venom Ice Axe with the standard Adze or optional hammer if your adventure requires it. The Venom's spike is minimal but provides good grip on ice and snow and plunges quite easily. The dual density grip on the lower shaft gives some warmth from the cold aluminum while the Lockdown Leash decreases the chances of you glissading away without your trusty ice axe.
Features:
Head: Head, Hammer/Adze
Spike: Stainless steel
Pick: Tech Pick: Chromoly steel
Shaft: Aluminum
Grip: Dual-density
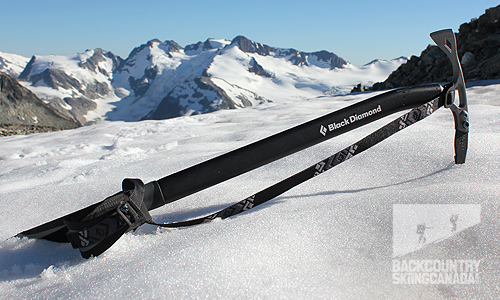
Aluminum shaft.
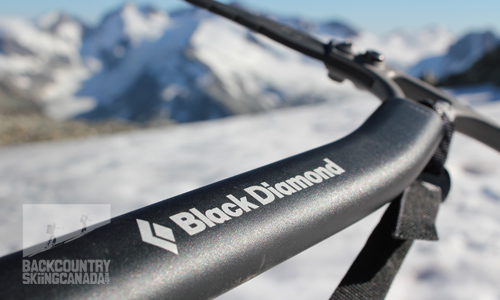
Comfy leash with plenty of slack.
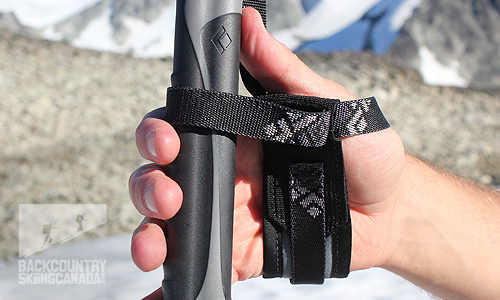
Dual density grip.
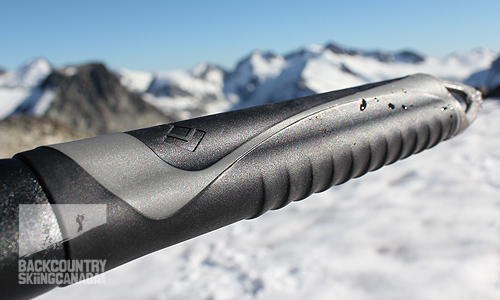
Adze with subtle BD icon in the middle.
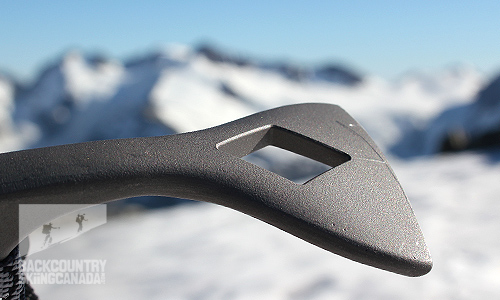
Aggressive chromoly steel pick.
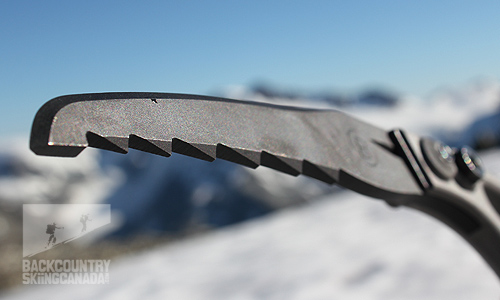
Stainless steel spike.
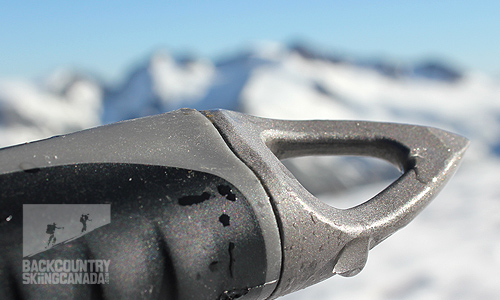
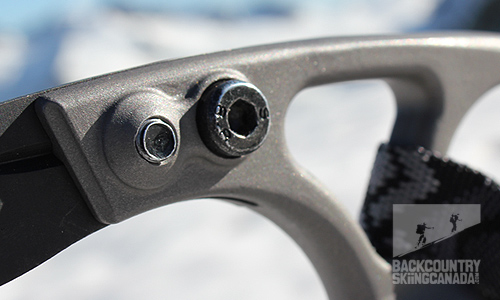
Replaceable pick.
Verdict:
The Black Diamond Venom Ice Axe is a high quality mid weight axe with an ergonomic shaft design and lower grip that make it really comfortable to use. The replaceable pick is ideal for more technical adventures or to keep your axe like new over the long term as you can always pop in a new pick with just an allan key. The Venom is designed as a crossover ice axe for more technical use in steeper terrain so it is only available in shorter lengths of 50cm to 64cm. Fear not though as it will still work well as a standard mountaineering axe for self arresting your fall or anchor building and step cutting.
PROS:
- Hybrid design to tackle a variety of terrain
- Good (but not great) weight
- Shaft handle grip is easy to hold and prevents as many chips on the sleek paint job
CONS:
- The leash can be a bit cumbersome as it is designed to allow for a lower grip
- The Material used on the leash absorbs a lot of water if in contact with the snow and thus your hands get cold
- On the upper end of ice axe weights
Rating: 8.5/10
Innovation 1.5/2
Function 1 /2
Aesthetics 2 /2
Features 2/2
Quality / Price 2/2
Black Diamond Storm Headlampe:
Price: $49.95 US
Colours: Ultralight, Mango, Matte Black
LED type: 1 triple power, 4 single power (2 red, 2 white)
Lumens: 100
Max Distance: 70m (Triple Power LED), 25m (Single Power LEDs)
Max Burn Time: 50 hours (Triple Power LED), 125 hours (Single Power LEDs)
Batteries: 4 AAA
Weight with Batteries: 110g, 3.9 oz (62G without batteries)
IPX rating: 7
Warranty: 3 years
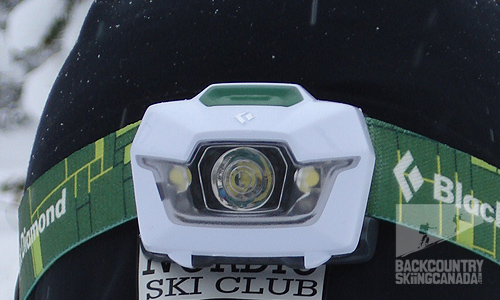
Modes
Distance/Proximity
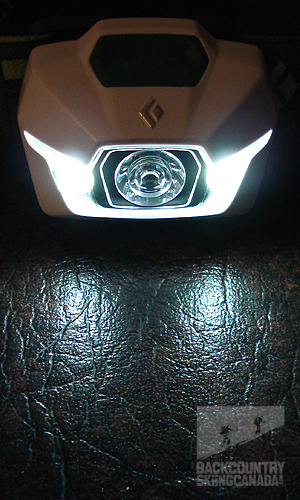
Each time the Storm is turned on in white mode it will alternate between distance and proximity modes. For example, if you turn it on and it is in distance mode, turn it off and turn it on again and it will be in proximity mode. For distance mode, the main light is on and for proximity mode the two side lights are on.
I really liked the proximity mode as it allows you to save battery power when performing close up activities where you really do not need the full power. In distance mode, the Storm shines for up to 70 meters, but it uses much more battery life.
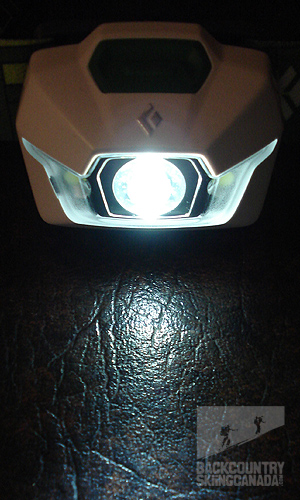
Dim
Turn the headlamp on in white mode (either distance or proximity) then hold down the button to dim the light. Dimming the light is great for saving battery life. I also loved it for doing things while people around you are sleeping, such as getting up early in a cabin. Having been woken up many times in the past by having someone’s headlamp shining in my face as they rise for an alpine start, I really appreciated this feature.
Strobe
Do three quick clicks on button when headlamp is off to initiate strobe mode. Strobe works in either red or white modes.
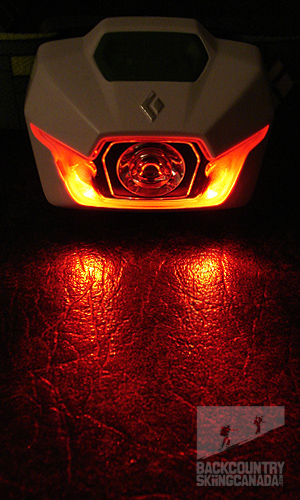
Red or night vision
When the headlamp is off, hold the button down for three seconds and the light will turn on in red mode.
Lock
With the power off in white mode hold the button down for six seconds. First the red light will come on and then the blue light in the battery meter will come on to indicate the headlamp is locked. Hold the button again for six seconds to unlock.
I am a huge fan of the lock mode. After multiple times over the years of arriving at camp only to find that my headlamp had been on all day in my backpack, I think the lock mode is fantastic idea. I did find, however, that initiating lock mode could be a bit cumbersome for two reasons. First, the headlamp can only be locked from the white mode. Specifically, if the headlamp is in red mode, you have to hold the button for three seconds to put it in white mode before holding it for another six seconds to lock it. Second, when you are holding the button down to lock the lamp the red light comes on before the lamp goes into lock mode. On multiple occasions this caused me to think I was turning on the red mode by accident so I stopped holding the button before the headlamp actually locked. Based on this, it could be beneficial to have two buttons on the Storm: one to lock it and one for everything else.
Along the same lines, I like that with the Storm I did not have to scroll though all the features to get to the one I wanted. Initially, however, I found it difficult to remember how to get to the desired mode. In order to help with this learning period, it would be helpful if Black Diamond put a sticker with the basic instructions for the modes on the back of the headlamp, even something very basic would be helpful.
Battery Meter
The Storm has a battery meter on the side of the headlamp. I found this to be a very helpful feature. Often in the past when packing for a trip I have wondered whether or not I need to take spare batteries or if I should change them before leaving. This has lead to many batteries being changed potentially before their time in order to save from carrying extra ones. The Strom battery meter lights up for the first three seconds when turned on in white mode. The meter has three levels: green means there is 75-100% of battery life remaining, orange 25-75% and red less than 25%. A very useful feature.
Unfortunately, although green clearly means the batteries are good and red means they need changing, I found orange to be almost as ambiguous as not having a meter at all; 25 to 75 % is a very large range. As such, I think it would be better if there were four levels indicated so the middle range could be divided into two, giving a more specific idea of how much battery life remains.
Features:
Fully waterproof: 1 meter under water for 30 minutes
Modes: Proximity, Distance, Night, Lock and Strobe modes
Battery: Battery Meter
Verdict:
Overall, I liked the Black Diamond Storm headlamp. It is the first headlamp that I have had with a battery meter, which I found to be super useful. I also liked the dimming feature both to save battery power and to give the option of a very low level of light when appropriate. I liked the proximity feature for the same reasons. Although I have never taken a headlamp under water, the fact that the Storm is waterproof gave me peace of mind when using it in a rain or snowstorm. As I said before, I am also a huge fan of the lock mode as this can really help prevent wasted batteries.
Looking at the Tech Features on the other Black Diamond headlamps, the Storm seems to be a great compromise between the cheaper options that are not much lighter, have a lot fewer lumens and don’t have a lock mode and the more expensive options that are heavier and have a shorter battery life but are brighter.
Too my annoyance, I initially found (and will probably find after any period of not using the Storm) it tricky to remember how to access the different modes. Having two buttons may help to reduce some of this confusion (as well as making lock mode easier to enter). Having a “cheat sheet” on the battery door may also help with this problem.
PROS:
-Dimmer option
-Proximity mode option
-Battery meter tells
-Lock mode prevents misuse of batteries
-Waterproofing gives peace of mind
-Don’t have to scroll through different options
-A great option for weight, options and lumens for the price
CONS:
-Hard to remember how to activate different features when headlamp is new or hasn’t been used in a while
-100 lumens, obviously, provides much less light than 200 lumens
-Battery meter only has 3 levels
Rating: 8.5/10
Innovation 1.5 /2
Function 1.5 /2
Aesthetics 2/2
Features 2/2
Quality / Price 1.5 /2
Black Diamond Couloir Harness:
Price: $54.95 US
Colours: Burnt Orange, Coal
Sizes: S/M, M/L, L/XL, XL/XXL
Weight: 230g / 8oz
Weight
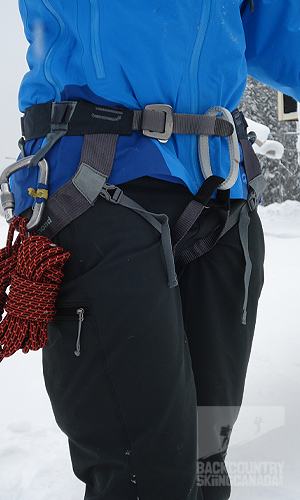
Weighting in at only 230 grams the Couloir harness is extremely lightweight. It also packs down to the size of a can of soup, which makes it easy to fit into a pack
Leg Loops
The releasable leg loops on the Couloir mean that it is easy to put on or take off while wearing skis or crampons. Super convenient.
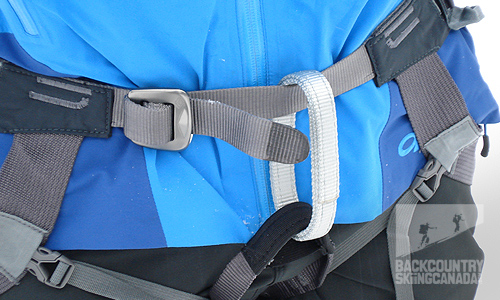
To put the harness on, you hold the waistband in place and pass the belay loop through your legs. You then put the waistband through the belay loop and do up the buckle (remembering to double back). Finally, you click the two leg loops into place. With warms hands, this can be done very quickly and easily. Unfortunately, with cold hands or gloves on the buckle is difficult to use, as there is not much extra space to thread the waistband back through and between the two buckles to double it back.
Materials
The Colouir is made of fast drying webbing. The webbing is also low profile, which I found meant it is comfortable to wear while skiing and fits well under a pack. Although the webbing would not be comfortable to sit in for long periods of time (such as multi-pitch rock climbing) that is not what the harness is intended for.
Loops
Unlike many other lightweight harnesses, the Colouir comes with a belay loop. As someone who has only ever had a harness with belays loops I like this feature. I know some people choose to cut the belay loop off to save another few grams, but for me I prefer to have it.
The Colouir comes with 2 gear loops and 4 ice clipper slots. In terms of glacier travel and easy alpine routes, I found the 2 gear loops to be sufficient. It is a limiting factor, however, on any adventures where you are carrying more gear.
Features:
Leg loops: Quick Release
Material: Low-profile fast drying webbing
Gear Loops: 2 webbing gear loops
Ice Clippers: 4 Ice Clipper slots
Loops: Belay and Haul Loops rated to 15 kN
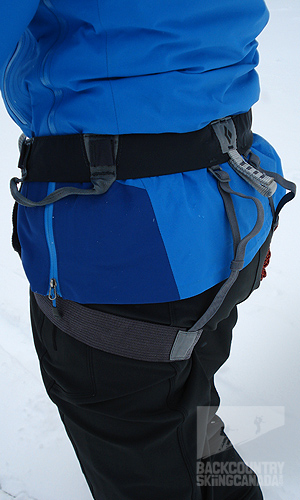
Be sure to double back Jack.
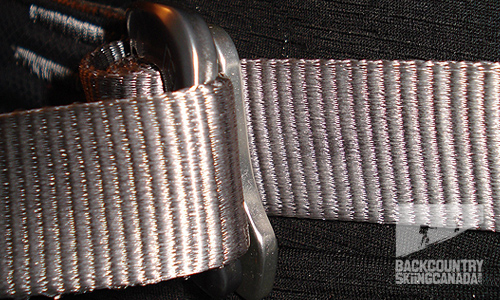
Slightly larger than a can of Haricots Rouge Fonce.
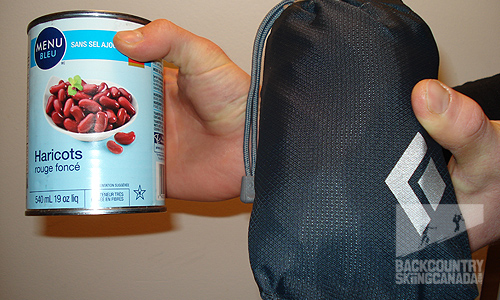
Verdict:
For glacier travel and easy mountaineering the Colouir is a lightweight, compact harness with a belay loop and releasable leg loops. Saving weight is always great but I especially appreciate it on trips where you’re unsure if you’ll need the harness and with a heavier harness you may simply leave it at home and take your chances. As a “what if?’ kind of person I like being able to throw the Colouir in the backpack just in case without having to consider the extra weight. When I was wearing the harness I found it easy to ski or walk in even for longer periods of time while wearing a pack. The releasable leg loops are a great feature of the Colouir; they make it very convenient to be able to put it on with skis or crampons on or to release it if nature calls. No longer will I have to take one ski off, balance precariously on the other foot while putting my boot through the leg loop only to have to repeat it all on the other side.
On the negative side, the buckle on the Colouir can be fiddly to do up and it is especially difficult to do with gloves on or cold hands. This is definitely something to consider if you plan on using the harness in really cold temperatures, as you may need to take your gloves off to double back the buckle. Also, since the belay loops is free to slide around on the waistband this is a potential spot for wear. My partner has been using the Colouir for several years now (multiple times a year) and has not had any problems with this yet, but the potential is there.
PROS:
-Lightweight and compact
-Has belay loop
-Easy to put on while wearing skis or crampons
-Comfortable to ski in
CONS:
-The buckle is fiddly to adjust especially with cold hands
-Wear potential where belay loop joins waist belt
Rating: 8.5/10
Innovation 1.5/2
Function 1.5/2
Aesthetics 2/2
Features 1.5/2
Quality / Price 2/2
This is only our opinion. Do you disagree? Did we miss something? Are we totally out to lunch? Join the discussion in the forums here, and let us know what you think. People like/dislike gear for different reasons so chime in and we'll get a well-rounded evaluation.
Back to the rest of the reviews.
Copyright © 2023-24 Backcountry Skiing Canada. All Rights Reserved.


