How to build a snow cave: It could just save your life
One piece of safety knowledge often overlooked by backcountry skiers is how to build a proper snow cave. This simple skill could make a night out much more comfortable and even save your life. Watch the quick video below and give the following words a good read then once the snow starts to pile up be sure to give it a try, practice makes perfect after-all!

The main points to remember are:
- Find a Suitable Location
- Dig an Entrance
- Dig a Tunnel
- Dig a Raised Floor
- Block the Entrance
Find a Suitable Location
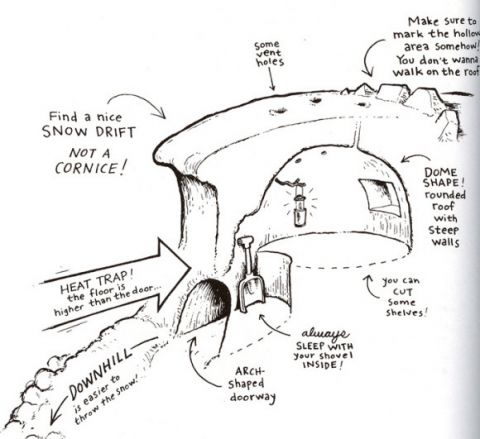
Scout around for a location away from any avalanche threats.2 Find a location on the downwind side of a small hill or a snow drift near ridges or trees. A good place to dig would have a snow depth of at least 4 or 5 feet. If the snow isn’t deep enough, pile on snow with a shovel. The snow should be a bit wet and packable rather than dry and powdery or granular in order for it to be structurally sound. 3 Just like you won’t be able to build a sand castle with dry sand, you won’t be able to build a snow cave unless the snow is wet.
Dig an Entrance
Start digging out an entry hole a foot or two wider than your body so that you may easily get in an out. You’re going to want to cover the hole up with a block of snow or maybe some tree branches or a tarp in order to block the wind from rolling through the entrance. A four-foot wide hole is ideal.

Dig a Tunnel
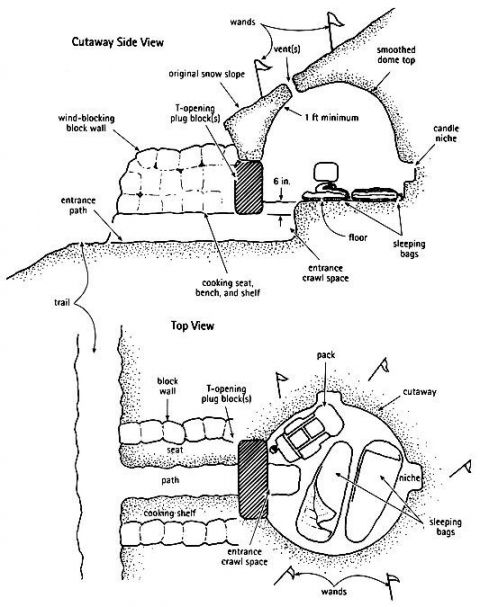
This is the hallway of your snow home. Dig a tunnel horizontally or at a slightly upward angle into the snow hill. Pack all of the excavated snow on the outside of your entrance, on either side of the entry hole as well as downhill. The tunnel should be at least 5-8 feet long.
Dig a Raised Floor
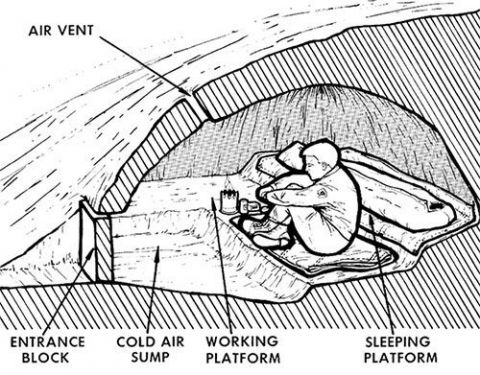
Now dig upwards and create a raised floor that is higher than the entrance. The raised floor will help contain heat which rises inside the cave. The walls of the cave should be steep and connect into a domed ceiling high enough to allow occupants to sit up comfortably inside the snow cave. Make sure the walls are at least a foot thick so that the snow cave is insulated well and the roof doesn’t collapse.

Block the Entrance
Cut out a block of snow from outside the cave to use as a door. You may also cover the entrance with branches and a good tarp if you have it so that it blocks the cold wind from blowing from outside and the warm air escaping from inside.
Final Details
Punch a few holes through the roof for proper ventilation – not directly up but on the angled sides in a diagonal fashion. Smooth out the walls and ceiling with your gloves so that when the snow melts, the water runs down along the walls rather than drips all over. Dig a small trench around your raised floor where it meets the wall so that melting snow won’t soak you or your items. Some people choose to create another raised area on top of the raised floor for a sleeping platform. This is a good idea because it utilizes the heat which rises toward the ceiling. Use the raised platform for sleeping on and the floor to light a candle or a small fire, but make sure the snow cave is well ventilated! Keep all of your gear and shovels inside.


